使用 Nexus OSS 为 Docker 镜像提供代理/缓存功能

今天记录一下利用 Nexus OSS 建立 Docker 镜像代理的过程。

前言

众所周知,在国内直接使用 docker 的官方镜像速度是很慢的,一般都需要使用镜像代理。不过,国内的代理一般采用定时同步的方式,镜像的版本更新不够及时,而且像 Github (ghcr.io),Google (gcr.io)等第三方库一般都是没有代理的,这就需要自行搭建镜像代理。除此之外,一些公司需要私有仓库上传一些内部的镜像,也可以用 nexus 实现。

搭建

这边我准备使用 docker 容器的方式搭建 nexus,不容易出现问题。

启动 Nexus 容器

这里选用 nexus3 的最新版本,当前为 3.34.1-01

1
2
3
4
5
docker run -d --name nexus --restart=always \
-p 8081:8081 \
-v /data:/nexus-data \
-e INSTALL4J_ADD_VM_PARAMS=-Xms128m -Xmx256m -XX:MaxDirectMemorySize=256m \
sonatype/nexus3

docker-compose 方式:

1
2
3
4
5
6
7
8
9
10
11
12
version: "3.8"
services:
nexus:
image: sonatype/nexus3
container_name: nexus
restart: always
environment:
INSTALL4J_ADD_VM_PARAMS: -Xms128m -Xmx256m -XX:MaxDirectMemorySize=256m
ports:
- 8081:8081
volumes:
- /data:/nexus-data

nexus 官方镜像的默认参数要求还挺高的。根据 nexus 的 dockerfile,可以看到可以通过环境变量INSTALL4J_ADD_VM_PARAMS覆盖默认参数。如果机器配置挺高的,可以不加上面的环境变量。

默认参数:

1
ENV INSTALL4J_ADD_VM_PARAMS=-Xms2703m -Xmx2703m -XX:MaxDirectMemorySize=2703m -Djava.util.prefs.userRoot=/nexus-data/javaprefs

当 8081 端口可以访问后,启动就完成了。

注意,给挂载的文件夹高点的权限,我这边直接给了 777,不然会报错,部分文件夹建不出来。

配置 Nexus OSS
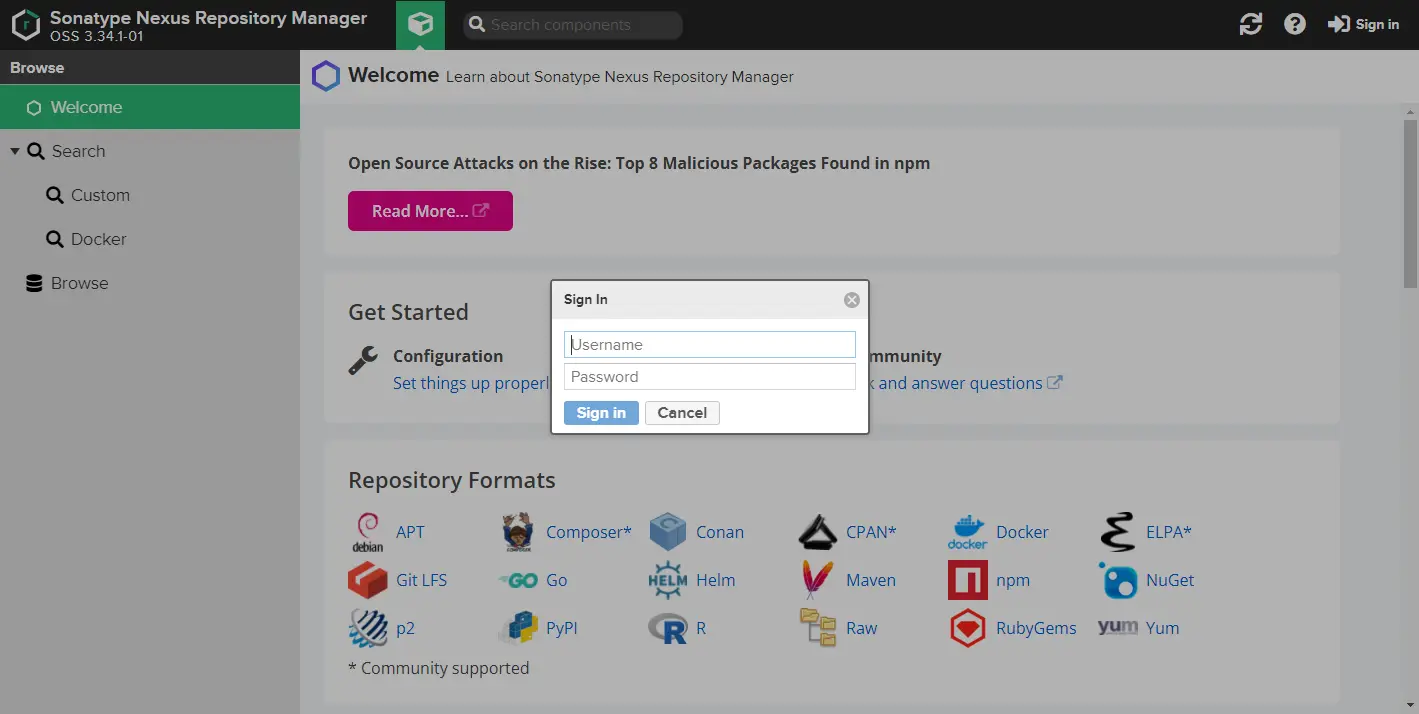
初始账号 admin,密码在挂载文件夹中的 admin.password 文件中。通过以下命令获取初始密码:

1
docker exec nexus3 cat /nexus-data/admin.password

为 Docker Hub 添加 Docker Proxy Repository

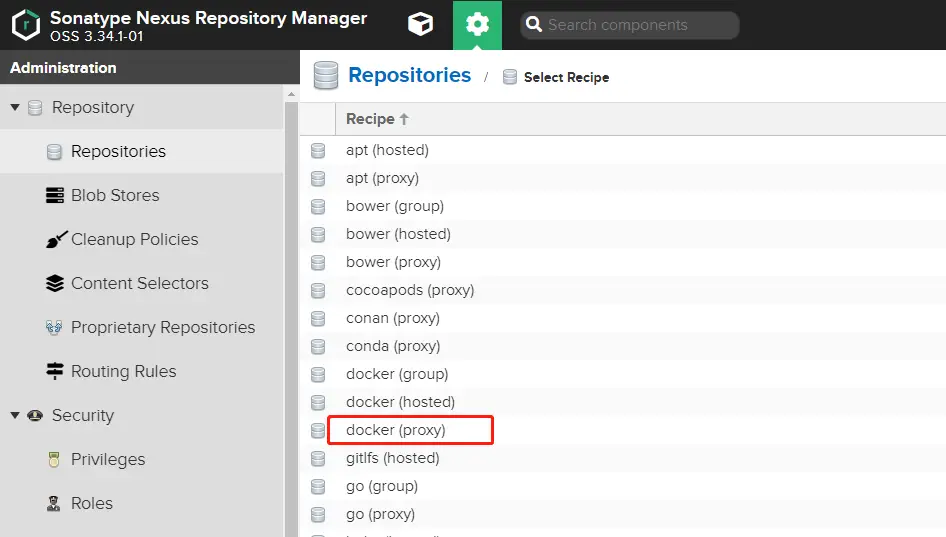
点击创建 Repository
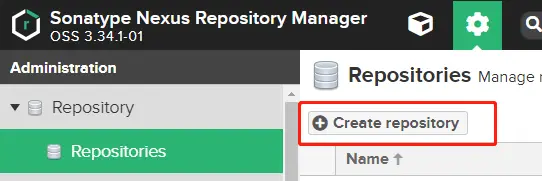
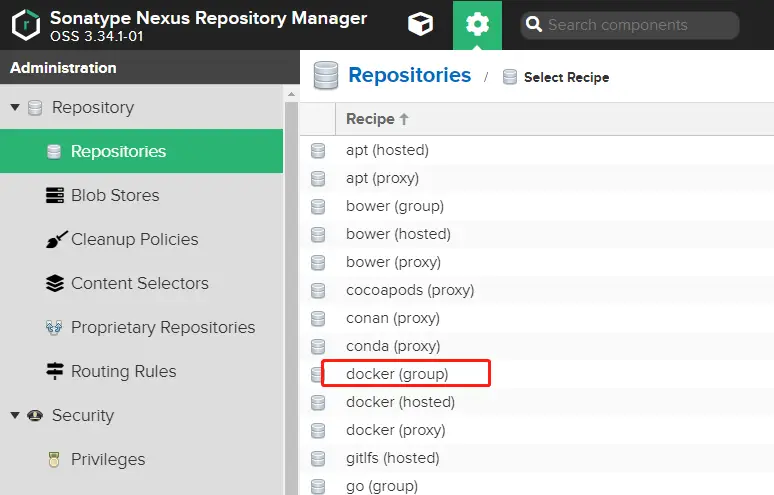
可以看到支持非常多的内容,这里选择docker(proxy)

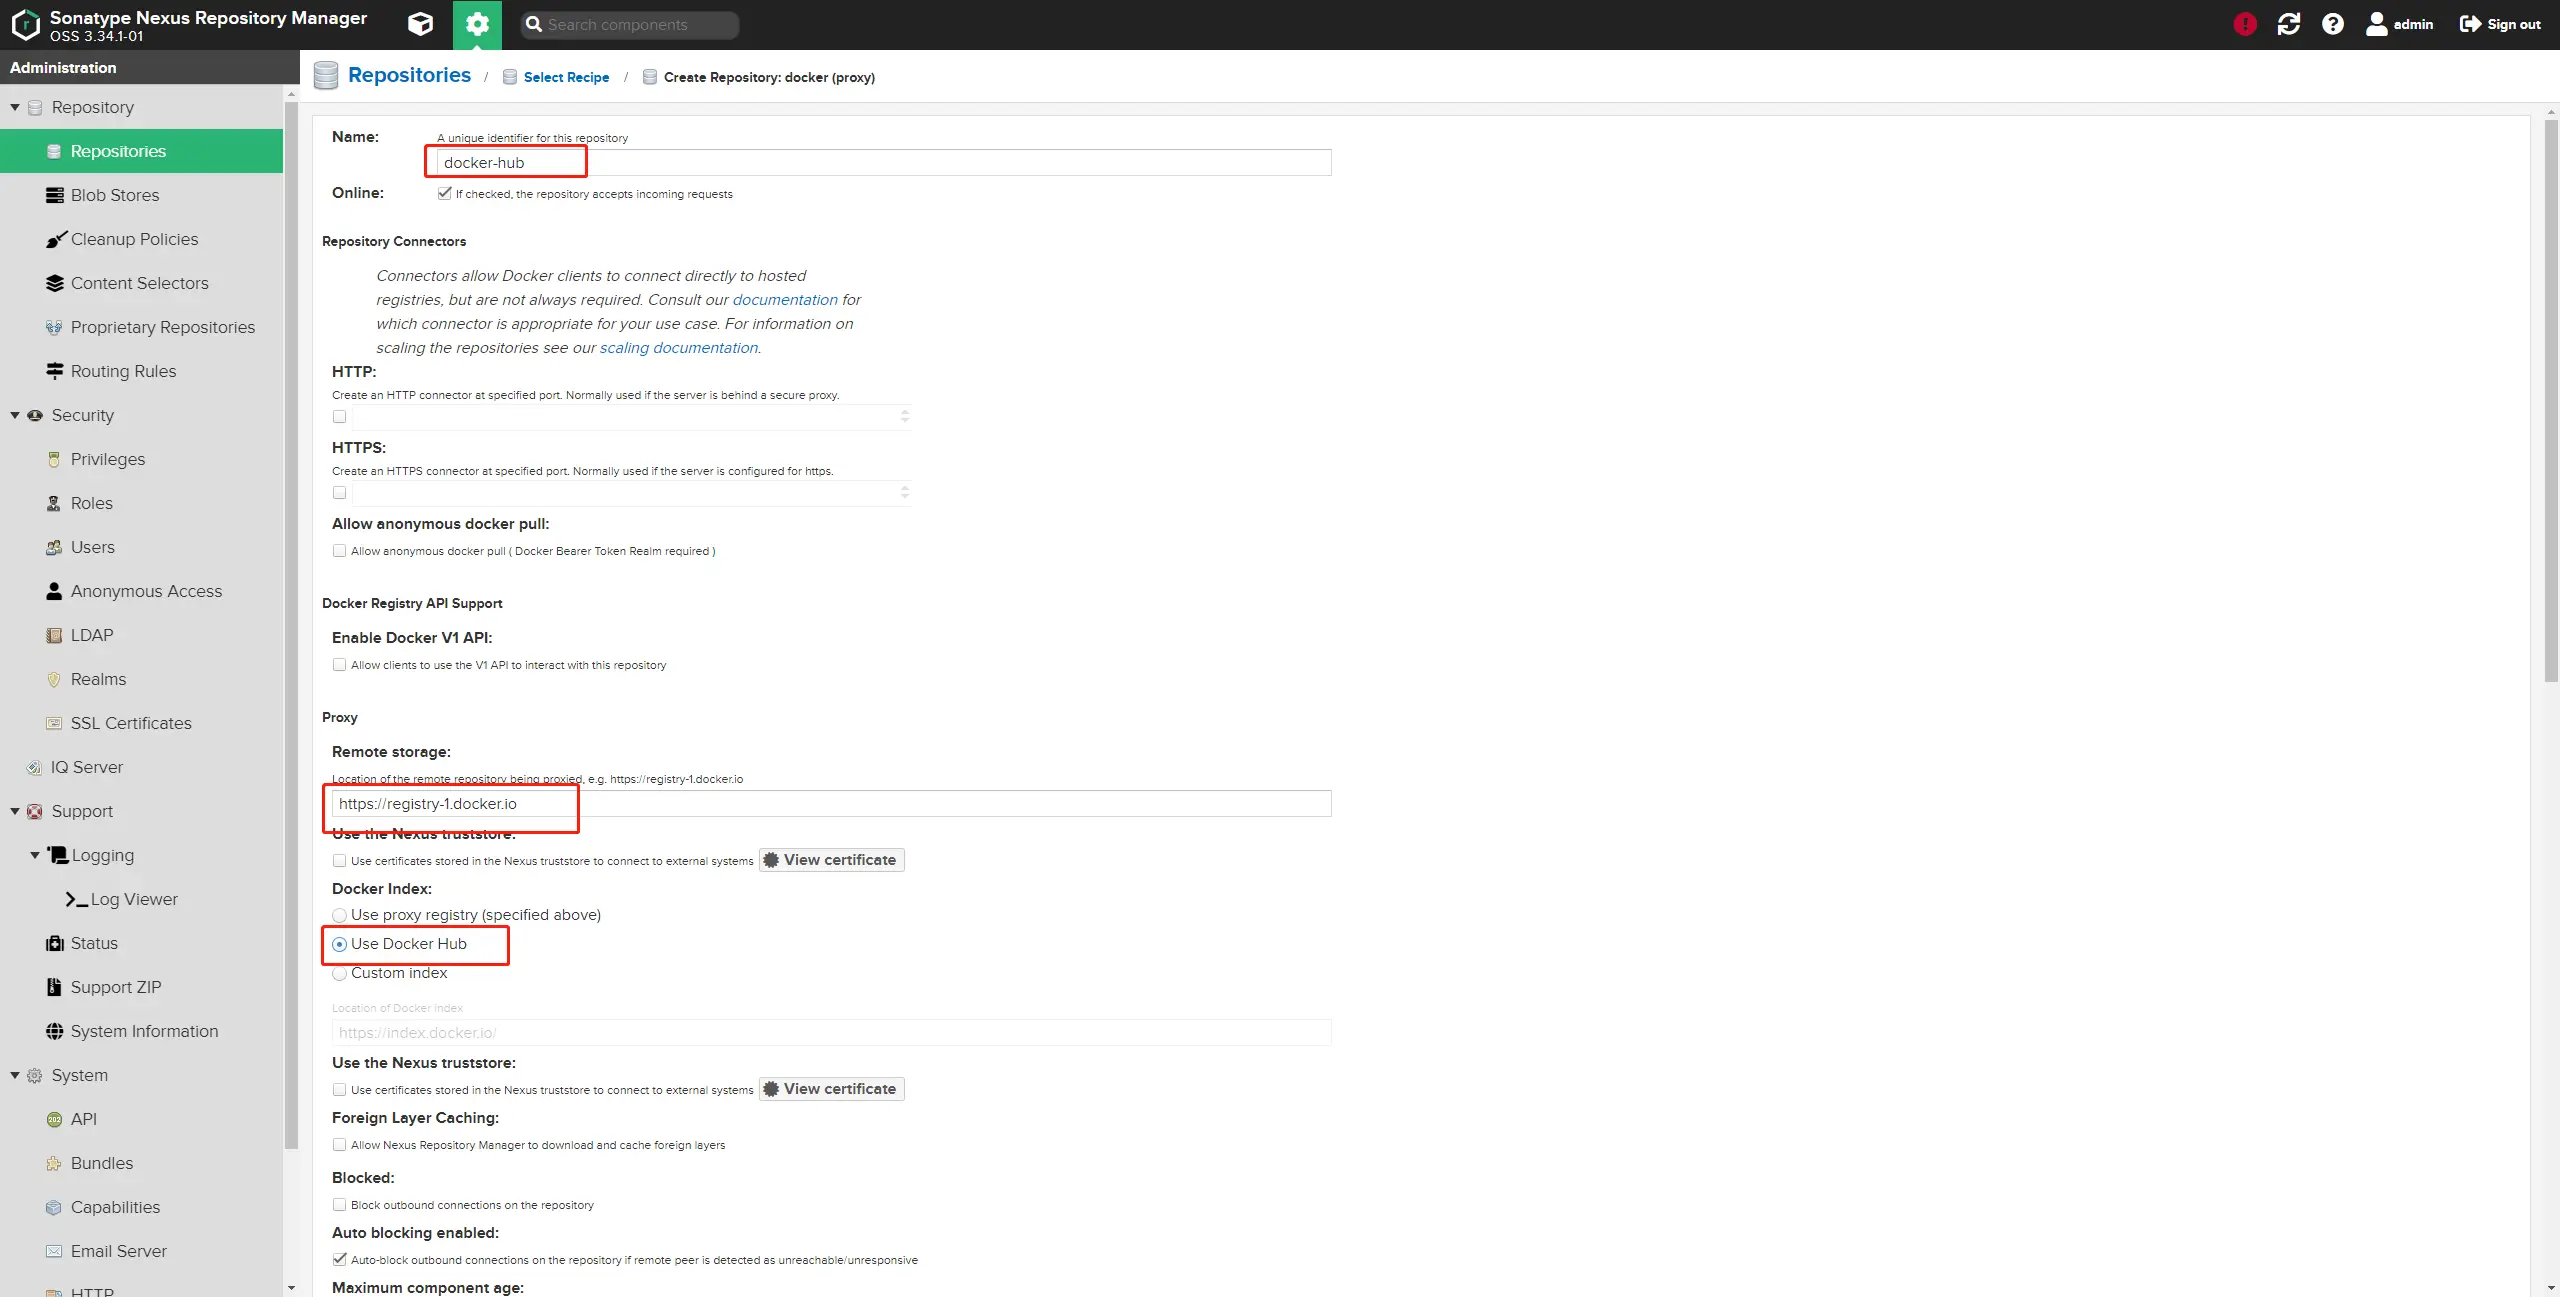
关键内容:

  • Proxy - Remote storage 配置成 https://registry-1.docker.io
  • Proxy - Docker Index 选择 Use Docker Hub,能够保持最新

保存即可

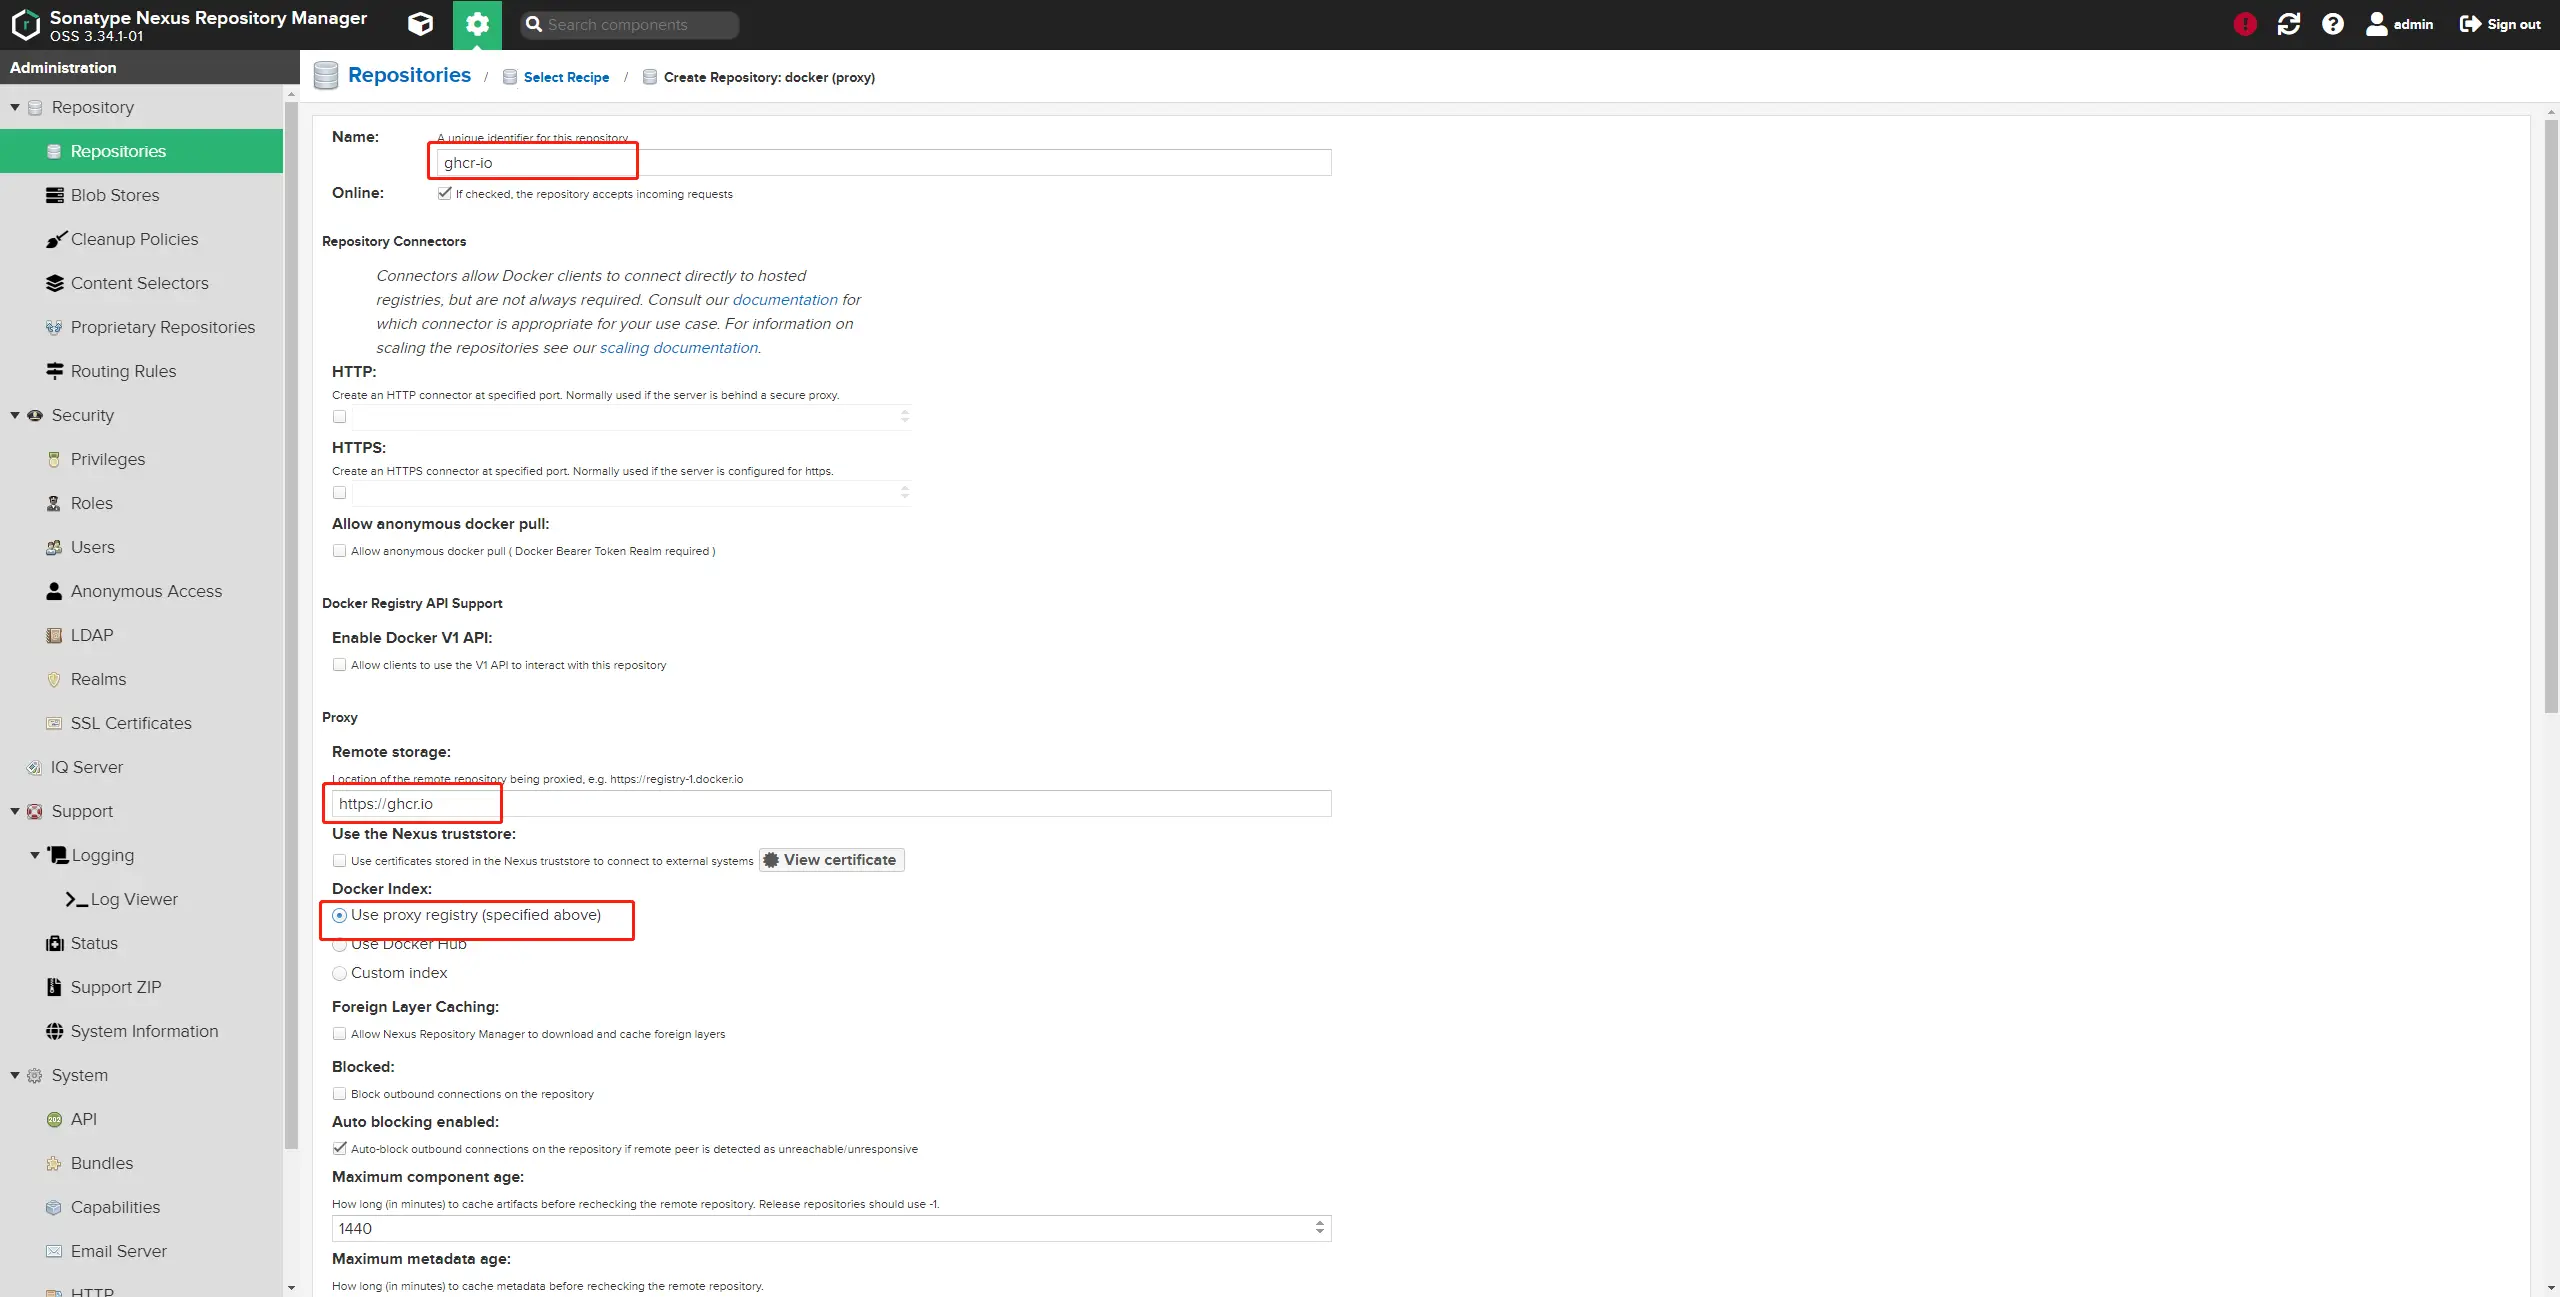
ghcr.io 添加 Docker Proxy Repository

这边再为 ghcr.io 创建一个代理,其他第三方仓库可以参考。
创建一个 Docker Group Repository

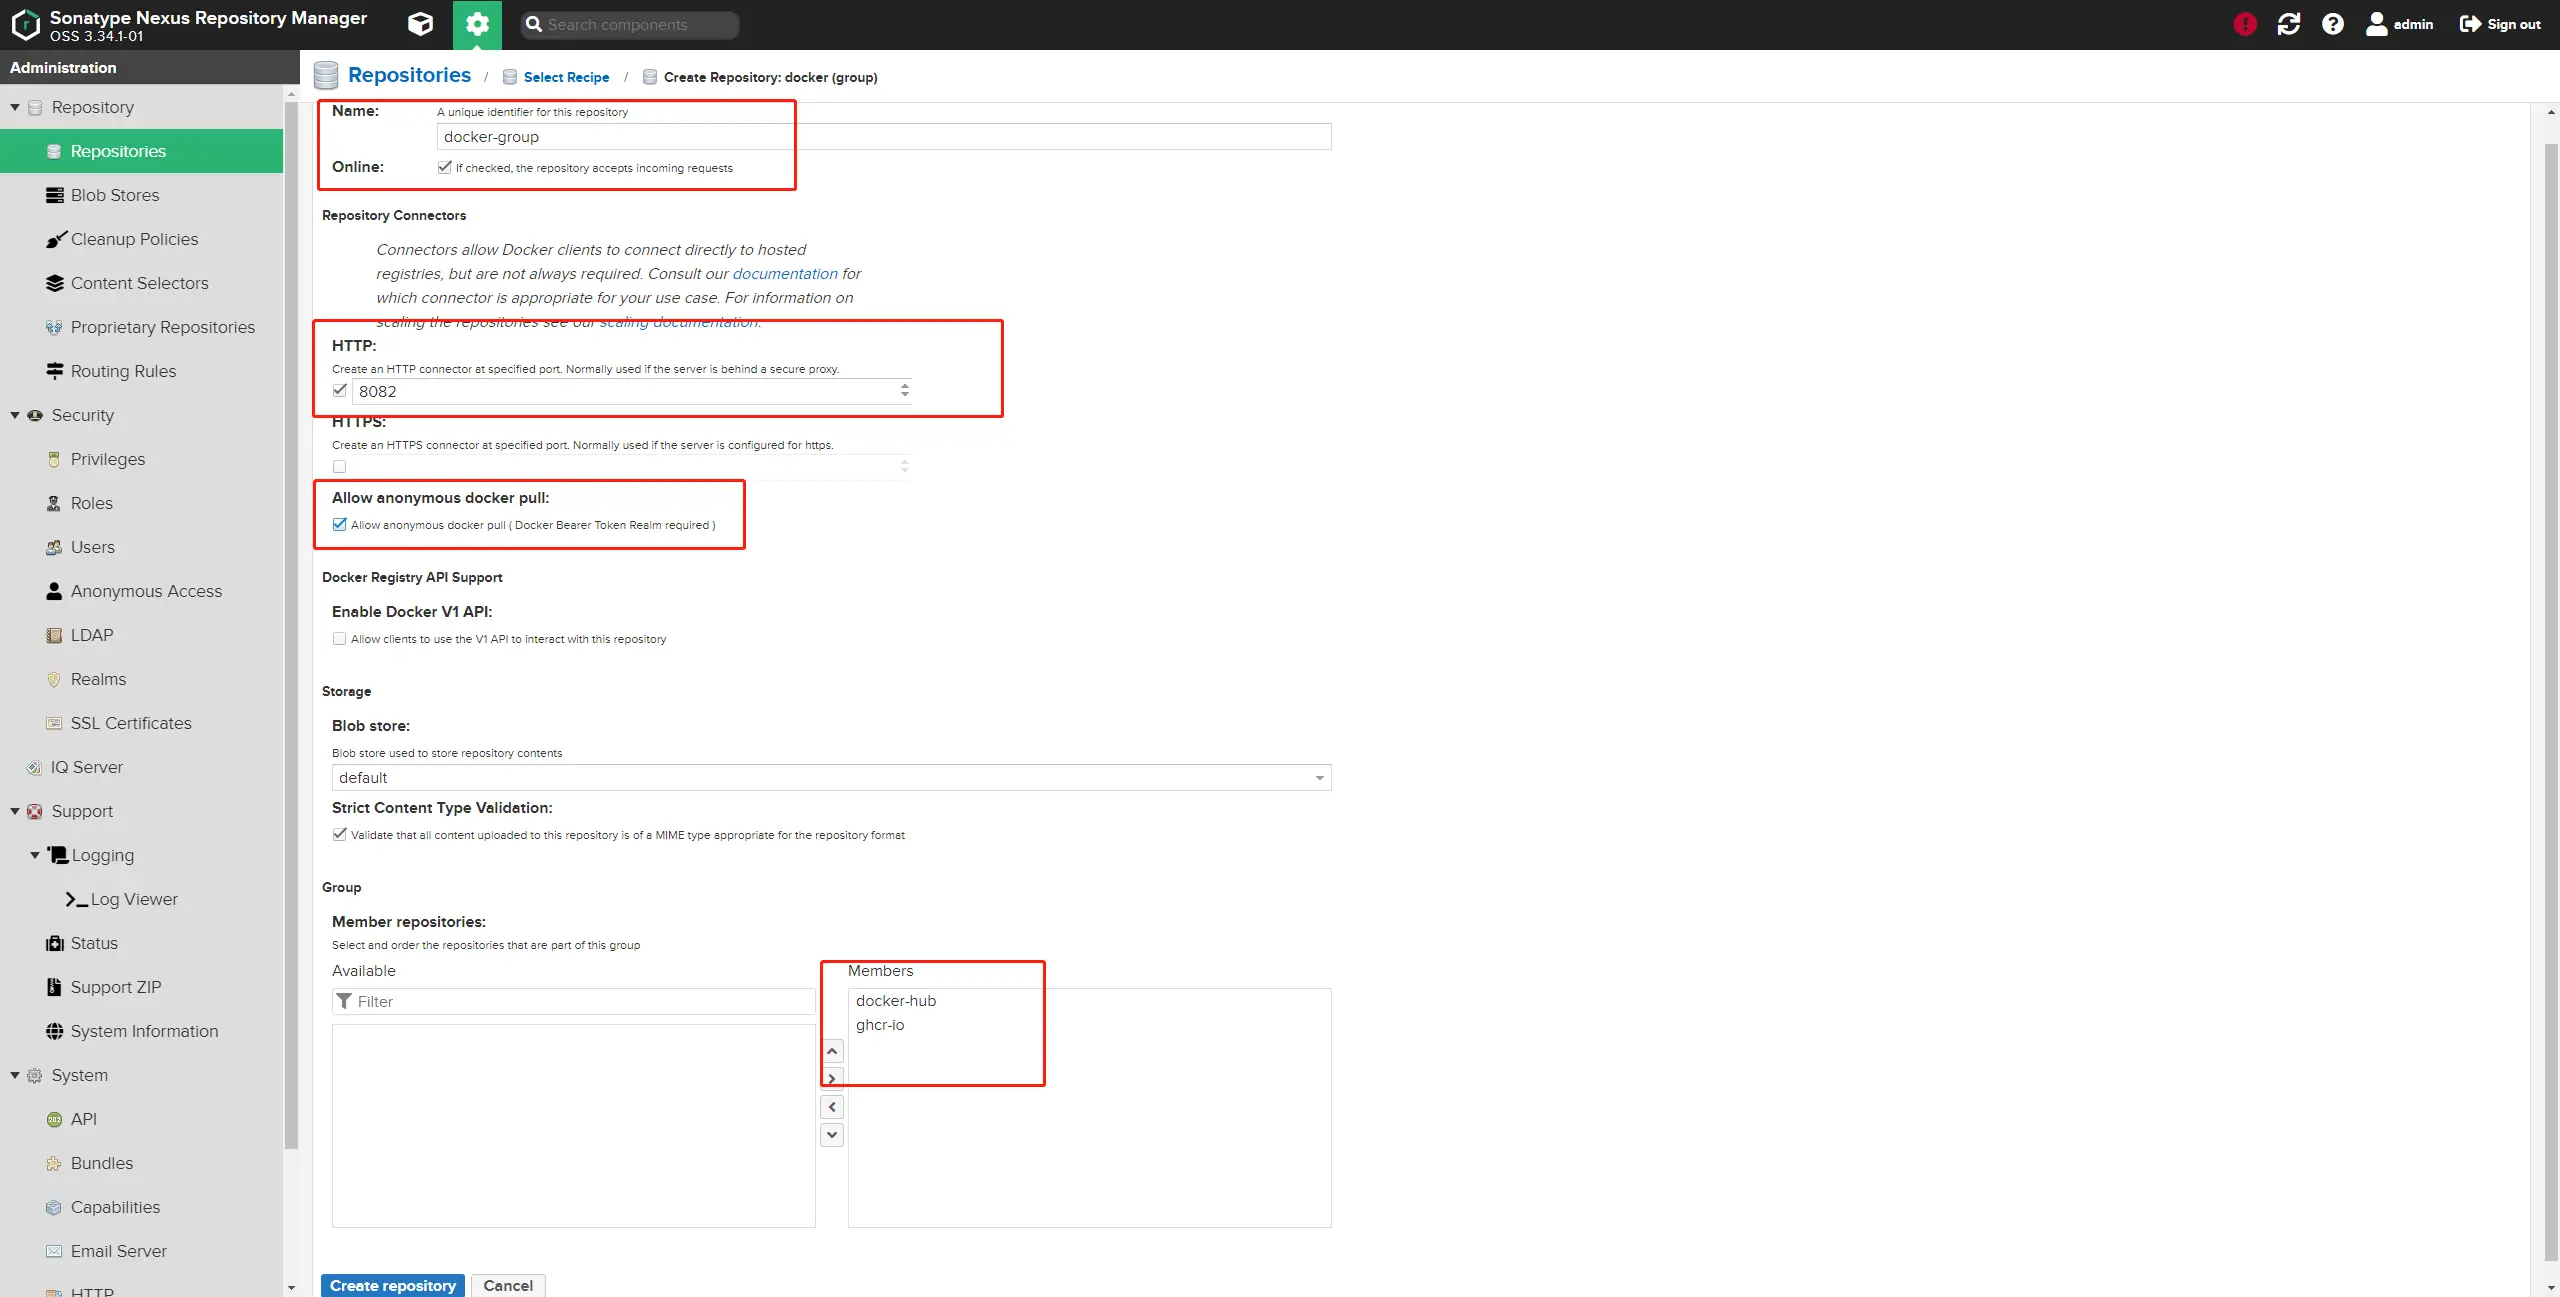
现在创建一个 Docker Group Repository,这是我用 nexus 而不是官方的 docker registry 来创建代理的一个重要原因,可以把所有 docker 代理集合在一起共用一个地址。
这个 Repository 是我实际访问的仓库,所以要创建一个 http connector,端口自定,只要不是 8081。勾选 Allow anonymous docker pull,允许不登录执行 docker pull

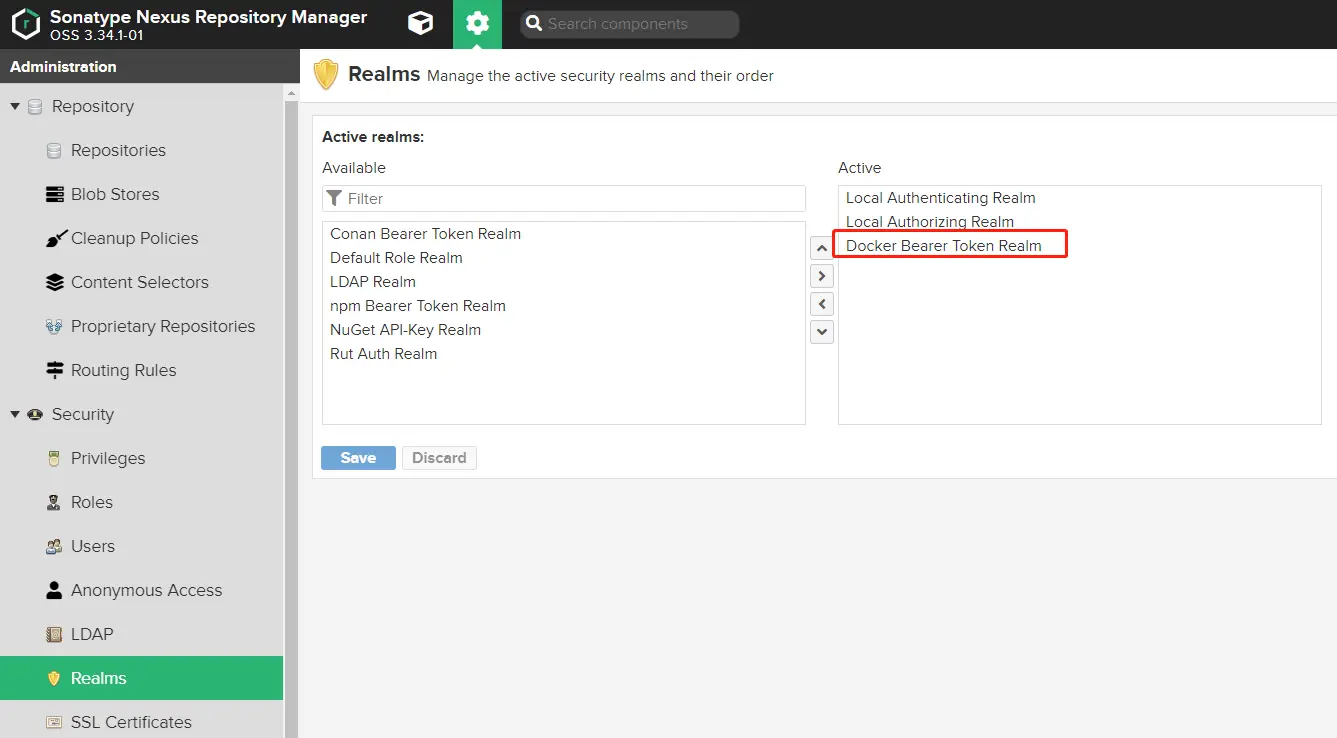
权限配置

这里要在Security-Realms里面启用Docker Bearer Token Realm,否则 docker 无法使用。
Nginx 代理

也许你注意到,我刚刚配置的是 http connector,而且也没有给 nexus 配置 ssl。如果不想配置,可以直接使用刚刚的 8082 端口使用了。

这里是我的 nginx 配置,注意替换 server_name,和 nexus 的地址,大家参考着来。这样配置,可以让 docker 仓库 、其他仓库(maven)和 webui 共用地址。

1
2
3
4
5
6
7
8
9
10
11
12
13
14
15
16
17
18
19
20
21
22
23
24
25
26
27
28
29
30
31
32
33
34
35
36
37
38
39
40
41
42
43
44
45
46
47
48
49
50
51
52
53
54
55
56
57
58
59
60
61
62
63
64
65
66
67
68
69
70
71
server
{
listen 80;
listen [::]:80;
server_name nexus.example.com ;
return 301 https://$host$request_uri;

access_log off;
}

server
{
listen 443 ssl http2;
listen [::]:443 ssl http2;
server_name nexus.example.com ;

# 证书部分
ssl_certificate /etc/ssl//fullchain.cer;
ssl_certificate_key /etc/ssl/cert.key;

# TLS 握手优化
ssl_session_cache builtin:1000 shared:SSL:10m;
ssl_session_timeout 5m;
keepalive_timeout 75s;
keepalive_requests 100;
#ssl_session_tickets off;
ssl_ecdh_curve secp384r1;

# TLS 版本控制
ssl_protocols TLSv1.2 TLSv1.3;
ssl_prefer_server_ciphers on;
ssl_ciphers TLS13-CHACHA20-POLY1305-SHA256:TLS13-AES-256-GCM-SHA384:TLS13-AES-128-GCM-SHA256:EECDH+CHACHA20:EECDH+AESGCM:EECDH+AES;

# 开启 1.3 0-RTT
ssl_early_data on;

# SSL Stapling
ssl_stapling on;
ssl_stapling_verify on;
resolver 223.5.5.5 1.1.1.1 1.0.0.1 valid=300s;
resolver_timeout 5s;

add_header Strict-Transport-Security "max-age=63072000; includeSubDomains; preload" always;

proxy_send_timeout 120;
proxy_read_timeout 300;
proxy_buffering off;
proxy_request_buffering off;
tcp_nodelay on;

client_max_body_size 0;

location / {
proxy_pass http://nexus:8081;
proxy_set_header Host $host;
proxy_set_header X-Real-IP $remote_addr;
proxy_set_header X-Forwarded-For $proxy_add_x_forwarded_for;
proxy_set_header X-Forwarded-Proto "https";
}

# 将 /v2/ 转到创建的docker http connector
location /v2/ {
proxy_pass http://nexus:8082;
proxy_set_header Host $host;
proxy_set_header X-Real-IP $remote_addr;
proxy_set_header X-Forwarded-For $proxy_add_x_forwarded_for;
proxy_set_header X-Forwarded-Proto "https";
}

access_log off;
}

使用

直接使用

范例:

这样拉取一个官方 redis 镜像。

1
docker pull nexus.example.com/redis

这样拉取一个 Github(ghcr.io) 的 zvonimirsun/yourls 镜像。

1
docker pull nexus.example.com/zvonimirsun/yourls

注意:

  • docker pull 的时候不要加https://
  • docker api 不支持 content-path,docker pull 直接使用根地址加上对应的包名,不要使用 repo 列表后面复制的 url。

配置到镜像

现在可以将地址配置到 docker 配置中了,nexus 本地找不到的仓库会依次去 group 中配置的 proxy repo 里面查找。

/etc/docker/daemon.json

1
2
3
4
{
"insecure-registries": [],
"registry-mirrors": ["https://nexus.example.com"]
}

如果是 http 地址,则配置到 insecure-registries 里。

现在 docker pull 使用的就是 nexus 的代理地址了,可以省去前面的地址了。